Sunday, February 28, 2016

A china cabinet and its better days...

Everything has been done to this cabinet.  Its been repaired, 
cleaned, painted, stenciled, lightly sanded, waxed, 
and now is for sale. 
This poor thing has finally seen a better day.  She spent some time in a gravel garage, I believe.  Her poor drawer was separated from her, as were her shelves.  I'm so fortunate to have all the 
pieces intact!  

Before, but with fixed shelves 

If you notice in the above picture, her bottom left cross beam is snapped out of the leg.  

If I snap that back into place, the drawer does not slide in.  There is just enough warp <from the garage life> to make her poor long drawer have problems doing its job.  
I removed the beam.  It was either remove the beam, or the drawer.  This was not a balanced beam, a lady must have her drawers ; )
She still has plenty of strength and I've seen many others with their beam removed too.  Its kinda like a wisdom tooth.  


Here you can see the edges of the boards are just rotted away.  These shelves are 14 inches deep.  I couldn't afford new boards and needed a cheap, easy, stable repair...  

Shelves that will not meet the little thingy to hold it up


Walking around the garage, and work shop, I remember a mirror that came with a buffet I bought a month or so ago.  It has that channel on it to attach to the back of this buffet <if you wanted to use it as a bedroom dresser....another story>
I only need to cut it to size and slip it around the peg.  BINGO! 


Broken shelf idea 
Fixed shelves
SHELVES!

Shelves!

First coat of chalk paint.  Its a soft green, and will have a worn brownish wash added later.  

Cleans up well 

Usually I like leaving spindles speak for themselves.  Only painting parts to highlight the curves.  Until it is waxed, I never know for sure how these legs will come out.  

So much better already 

Let the stencil begin!

Her nest is hidden inside, see it?

Stenciled drawer side


What do you see here?

Now for the brown wash.  I dunno if this soft green color has grown on me, but I do not like the brown wash.  
Right now, its at a standstill.  
This color reminds me of a dirty ashtray left in the rain, water.
I have had to do worse then repaint one panel.  Always a good way to look at things, eh?    

Brown-washed on right panel


Fixed!!  
<sigh of relief> 
Now for a re-stencil job.


The left spindle is unwaxed, the right one waxed.  
Waxing a piece gives it such glow.  


If you look close you can see small details like the line along the side support and the tiny fleurdisomething.


Here she is again.  Once you see that, its hard to unsee it.  So hard actually that I put the scroll work upside down, on the door for the finished project.  Keep scrolling. 


Looooooove the stencil detail along the side of the drawer.


Doily stencil work


Finished!  Whew! 

These next pictures are just playing around with lighting.  Amazing how different the cabinet looks with the light in a different place, or even natural sunlight as the last 
two pictures are. 


This item took about 12 hours to repair, paint and wax.  
It'll be for sale at Treasure's Galore Consignment Shop some time this week.  Thanks for reading!
-Kathy 


Tuesday, June 30, 2015

Tuesday divin'


This is what caught my eye on my way home from work...
An unpicked dive!?!?

<perks all over the place>

Solid wood rocker

Small side table, and the sides open up

Not one, but two lawn chairs

Barely used vacuum cleaner

Grand-baby-stuff storage ;)

Two stainless step-on trashcans
Marilyn Pics.  Dark one is metal, bigger is canvas

Knob Creek Chairs and Firetruck for the new grand-babe


Monday, May 11, 2015

LOVE is the word I was looking for ;)

Did you know that you can change NOEL into LOVE?
For Christmas someone gave me the word NOEL.
It had such cool colors and was sparkly I worked to find a new word that I could keep out all year long.
LOVE!


Noel

Love


LOVE me some re-use.  

Thursday, March 19, 2015

Bargain Desk to Beautiful Blog-Center


Do you know how hard it is to find smaller <not child size> desks?
With everyone using laptops now a days, it seems people want their desk to be on a smaller scale, too.  
I have always liked smaller desks.  Mostly because you can sneak one in almost anywhere.  

I found this one at Terri's Attic in Warrenton, for $30.00
What a bargain since its so small and perfect for my situation room!

It was in sad shape.  This side apparently sat against a window or maybe on a covered porch because its completely weather beaten.


The legs were black metal and I removed them just to fix this desk. 
Rickety is putting it lightly.  
Here I have it on the bench upside down, repairing the drawer slides.


From the other side.  You can see the weather beaten side on the right, here.


The little shelf was sadly falling apart and not supporting the legs very well.  Hubby helped me take it apart, reglue, clamp and screw it back together the best we could.  I wasnt about rebuilding this desk... only repairing.  


After all the work to get it back to working condition, I began sanding.  No, that is not my hand in this picture.  Soon as I laid down that handy-dandy palm sander to snap these shots, hub snatched it up and played around gettin it just perfect.  


The sides of the drawers were a mess.  What should a girl do?
Paint them, of course!


The center drawer had been written all over, and was a wreck.  I went ahead and painted the entire inside of that one.  The other two were not so bad, but after finishing all the work, I've decided to go ahead and paint the insides of those, also.  


I sorta skipped the painting part and only took pictures of the waxing part.  
Here the table top is almost waxed.  I paused long enough to snap the picture showing the bottom right corner NOT waxed.  
Waxing a piece of furniture gives it that durable finish and makes it last longer.  A must when using "flat" paint.  


Drawers with the sides painted black.  
This main color is an army green/grey kinda thing.  


Letting the wax cure and giving my poor arm a rest.


TA-DA!!
A finished desk for me!
Notice the black trim just under the top?  Its a bit of molding I decided to highlight with black from the drawer sides.  
The legs and handles are painted a shiny chrome paint color.  Makes the handles stand out very nicely.  


Here is the desk inside.  I love this color.  Such a great neutral with the black and silver highlights.  
Elegant yet understated.  My favorite!


Thanks for havin a peek at my project.  
Now you can know that all my blog posts will be done from this desk!  ;)


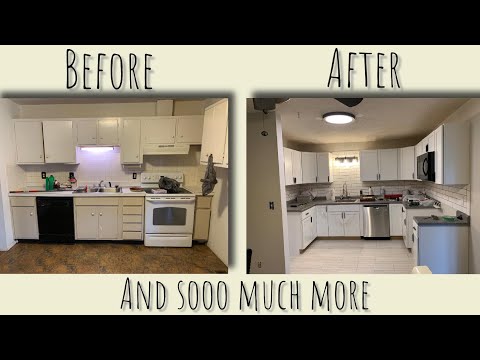
Rental Upgrade Nearing the end of renovation - Kitchen cabinet handles - Kitchen/Basement flooring

  In this episode, we see the kitchen cabinet handles installed, the kitchen flooring installed and the basement carpet squares installed, p...